Wednesday 16 November 2011

I got started on the Keel and chines late monday evening, and finished them up last night.
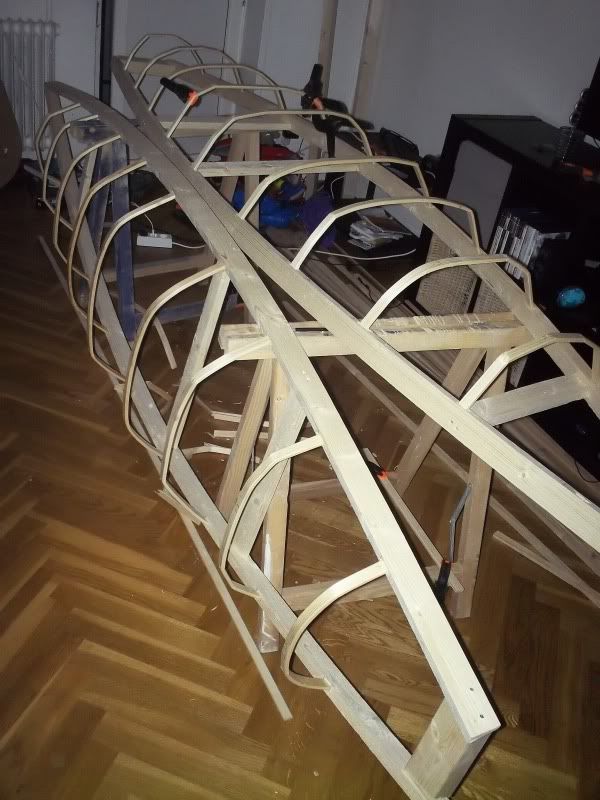
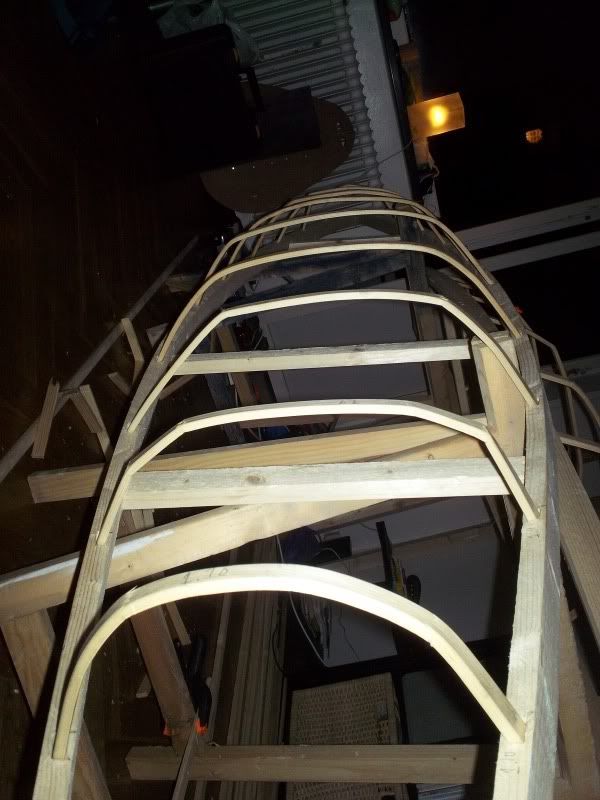
I decided to try nailing them on, mostly just to try something different, and I thought it would be faster than lashing.

It turned out to be a lot slower than lashing, and I had to put at least two nails at different angles into every rib/chine junction, and in the end I still had to lash the ends where the pressure was too much for the nails to hold.

The end result will work fine though, and without lashings on top of it I can plane the edges off without worrying about messing anything up.


I cut the keel piece, and had to do a bit of improvising to get it attached, but the end result feels solid enough.


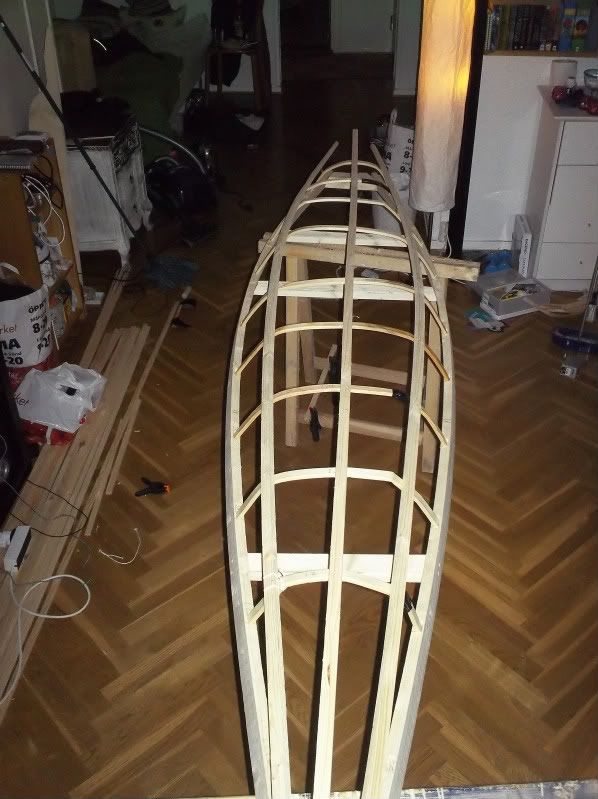
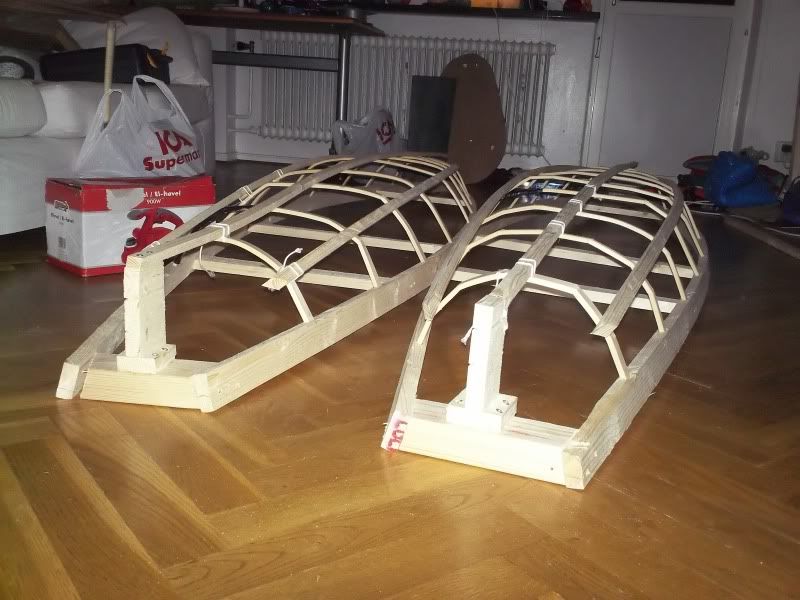
I have to say though, these two kayaks are the most crooked rushed things I've ever built.

I will probably have to build something proper at a later time, but first I want something I can paddle. :P

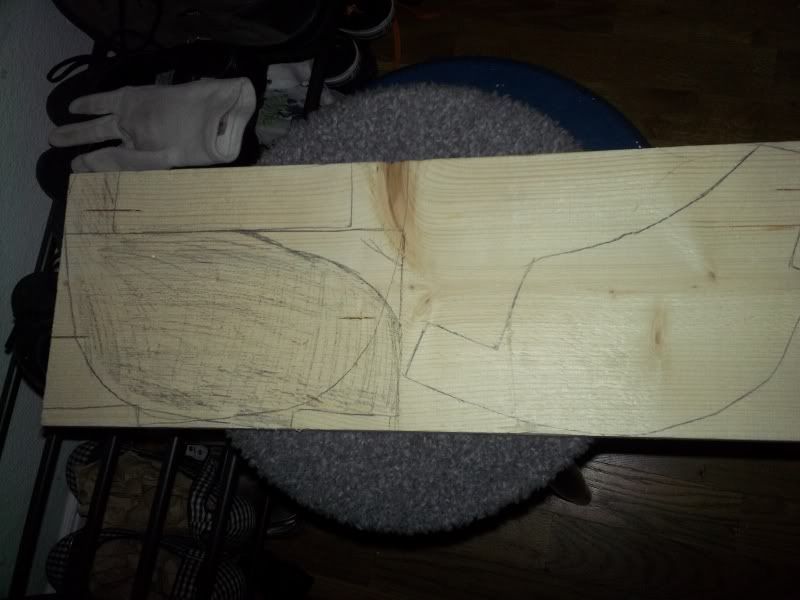
I measured and drew up the stemplates, and the last deck beam over the knees, but I only have a japanese hand saw, so the curves are a bit of a bother, so I'm bringing it out to my dad's place today to borrow his jigsaw and get the last bits done.


Once they're cut and attached it's time for a pre-skin test! :D

Monday 14 November 2011

Moved in!

OK, all moved into the apartment now, and my girlfriend is away in germany for a week! time to get building!
I spent 4 hours saturday evening and sunday morning making the rib mortices (had to stop because I didn't want to disturb the neighbours with my drilling).

Basically, I drill two holes, with an 8 mm drill, and connect them with a chisel, and square the hole so I can fit a piece of the rib stock into it.


Next up, ribs!
I spent about half an hour measuring and cutting the ribs to lenght, and built myself a quick improvised steam box of a sheet of styrofoam I got when I bought a bookshelf last week.

The bending was far from perfect, with about 8 ribs broken, and most of the others had quite sharp bends, but I forgot my bending jig when I moved and I was too lazy to keep going after 2½ hours and decided it was good enough.


I started tying on the keel and chines, but I'll get some pictures and add them in the next post. :)

Sunday 30 October 2011

Day 1

We're moving to Malmö next weekend, and we're going to live about 1 KM from the canals, which of course means I want a kayak we can fit into our storage space! :D

So I figured I should be able to fit a 3 meter kayak in, the space is easily big enough, the issue will be getting it through the door, but 3m should be manageable.

As usual, every kayak starts with shopping for lumber.
We went out and got 10 planks, 120x22mm x 3meters, a bunch of rib stock (about 30 meters) and some baseboard for the coaming.

And then comes ripping the planks down to the relevant width.

Photobucket

I went a bit overboard here, because I've had gunwales break while bending them into the forms before, and I didn't want to get the circle saw out again once I was done with it.

So I made 6 gunwale planks, and 8 chine/keel planks, enough to break a gunwale and a chine on each boat.

I also went overboard with the shopping, as you can see in the bottom right I had 5 of the 10 planks I bought left over.
As for the shape I had looked around at playboats and surf kayaks, because that's what you usually get with a kayak this short, and decided to not make it as pointy, so I made the back end about 40 cm wide, but kept the front pointy.

So it will be about 3 meters long, 60 cm wide, pointy in the bow, with a flat/rounded stern.

I got started on fitting the shape, and adding the flat deck beams.

Photobucket
After about 4 hours I had gunwales and deck beams put together for both boats.

And that's it for this weekend, next weekend we're moving, and all of this will go into our storage space, and I'll finish it up there.

Photobucket